Put a few hours of elbow grease into showing your buddies just how seriously you take brewing.
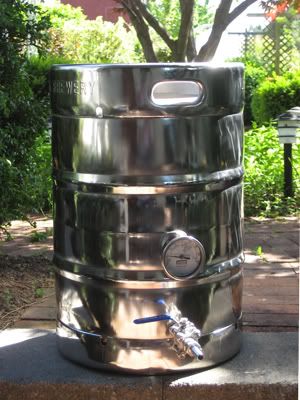
Polishing this keg took me about 8 hours, it looks great, makes clean up easier and draws lot of compliments.
You'll need the following....
- (1) angle grinder - LINK -
- If you buy a good one you can pretty much run the thing constantly and still have it for other projects. If you opt for a cheap grinder it will over heat and you may have to stop to let it cool, either that or burn it up and toss is.
- (1) backer disk for the pad you will use - LINK -
- This gives support for the disc your will be using. You'll need it for both the finishing disc and polishing pad.
- (6) Finishing Discs - LINK -
- This removes paint, rough spots and brings the keg to a relative shine. The finishing disc will leave swirl marks in the keg though.
- (6) Polishing Pad - LINK -
- This, along with the compound, removes the swirl marks and brings the keg to a mirror shine.
- (1) Stick of polishing compound -LINK-
- The compound is really what does the work, you are just using the pad to apply it and work it into the metal. Look for one that says it is for stainless steel or hard metals.
To remove the swirl marks left with the finishing disc you will need the polishing pad with buffing compound. Apply the compound by spinning the pad up to full speed and then gently touch the polishing compound to the pad. Start in the center and pull to the edge of the pad. The polishing compound is like a big crayon; be sure to remove any paper around the stick so you don't get that on the pad.
The polishing goes through "stages". I'd advise starting on a small spot and polishing it until you reach a bright mirror finish so you see how far you can take the keg. Add the compound to the pad, buff and repeat. Your not doing any good running a dry pad on the keg, make sure you have plenty of compound. Once you get that small spot to the shine you want work in sections around the keg.
When you've reached the finish you want, clean any left over compound off with some solvent. Give the keg a good scub, inside and out and you will be ready to brew. Note: don't use brillo or green scrubbies on the polished surface as it will scratch it.
The bottom of my keg has discolored slightly from my burner about 6 inches from the bottom. I'm fine with this and don't see myself going back to repolish it. You could applying a small band of high temp. engine paint to the bottom of the keg to hide this.